Dafang AI Walling Finishing Machine
Tutorial Steps for Operation
#work
#robot
Putty robot Manual (Summary)
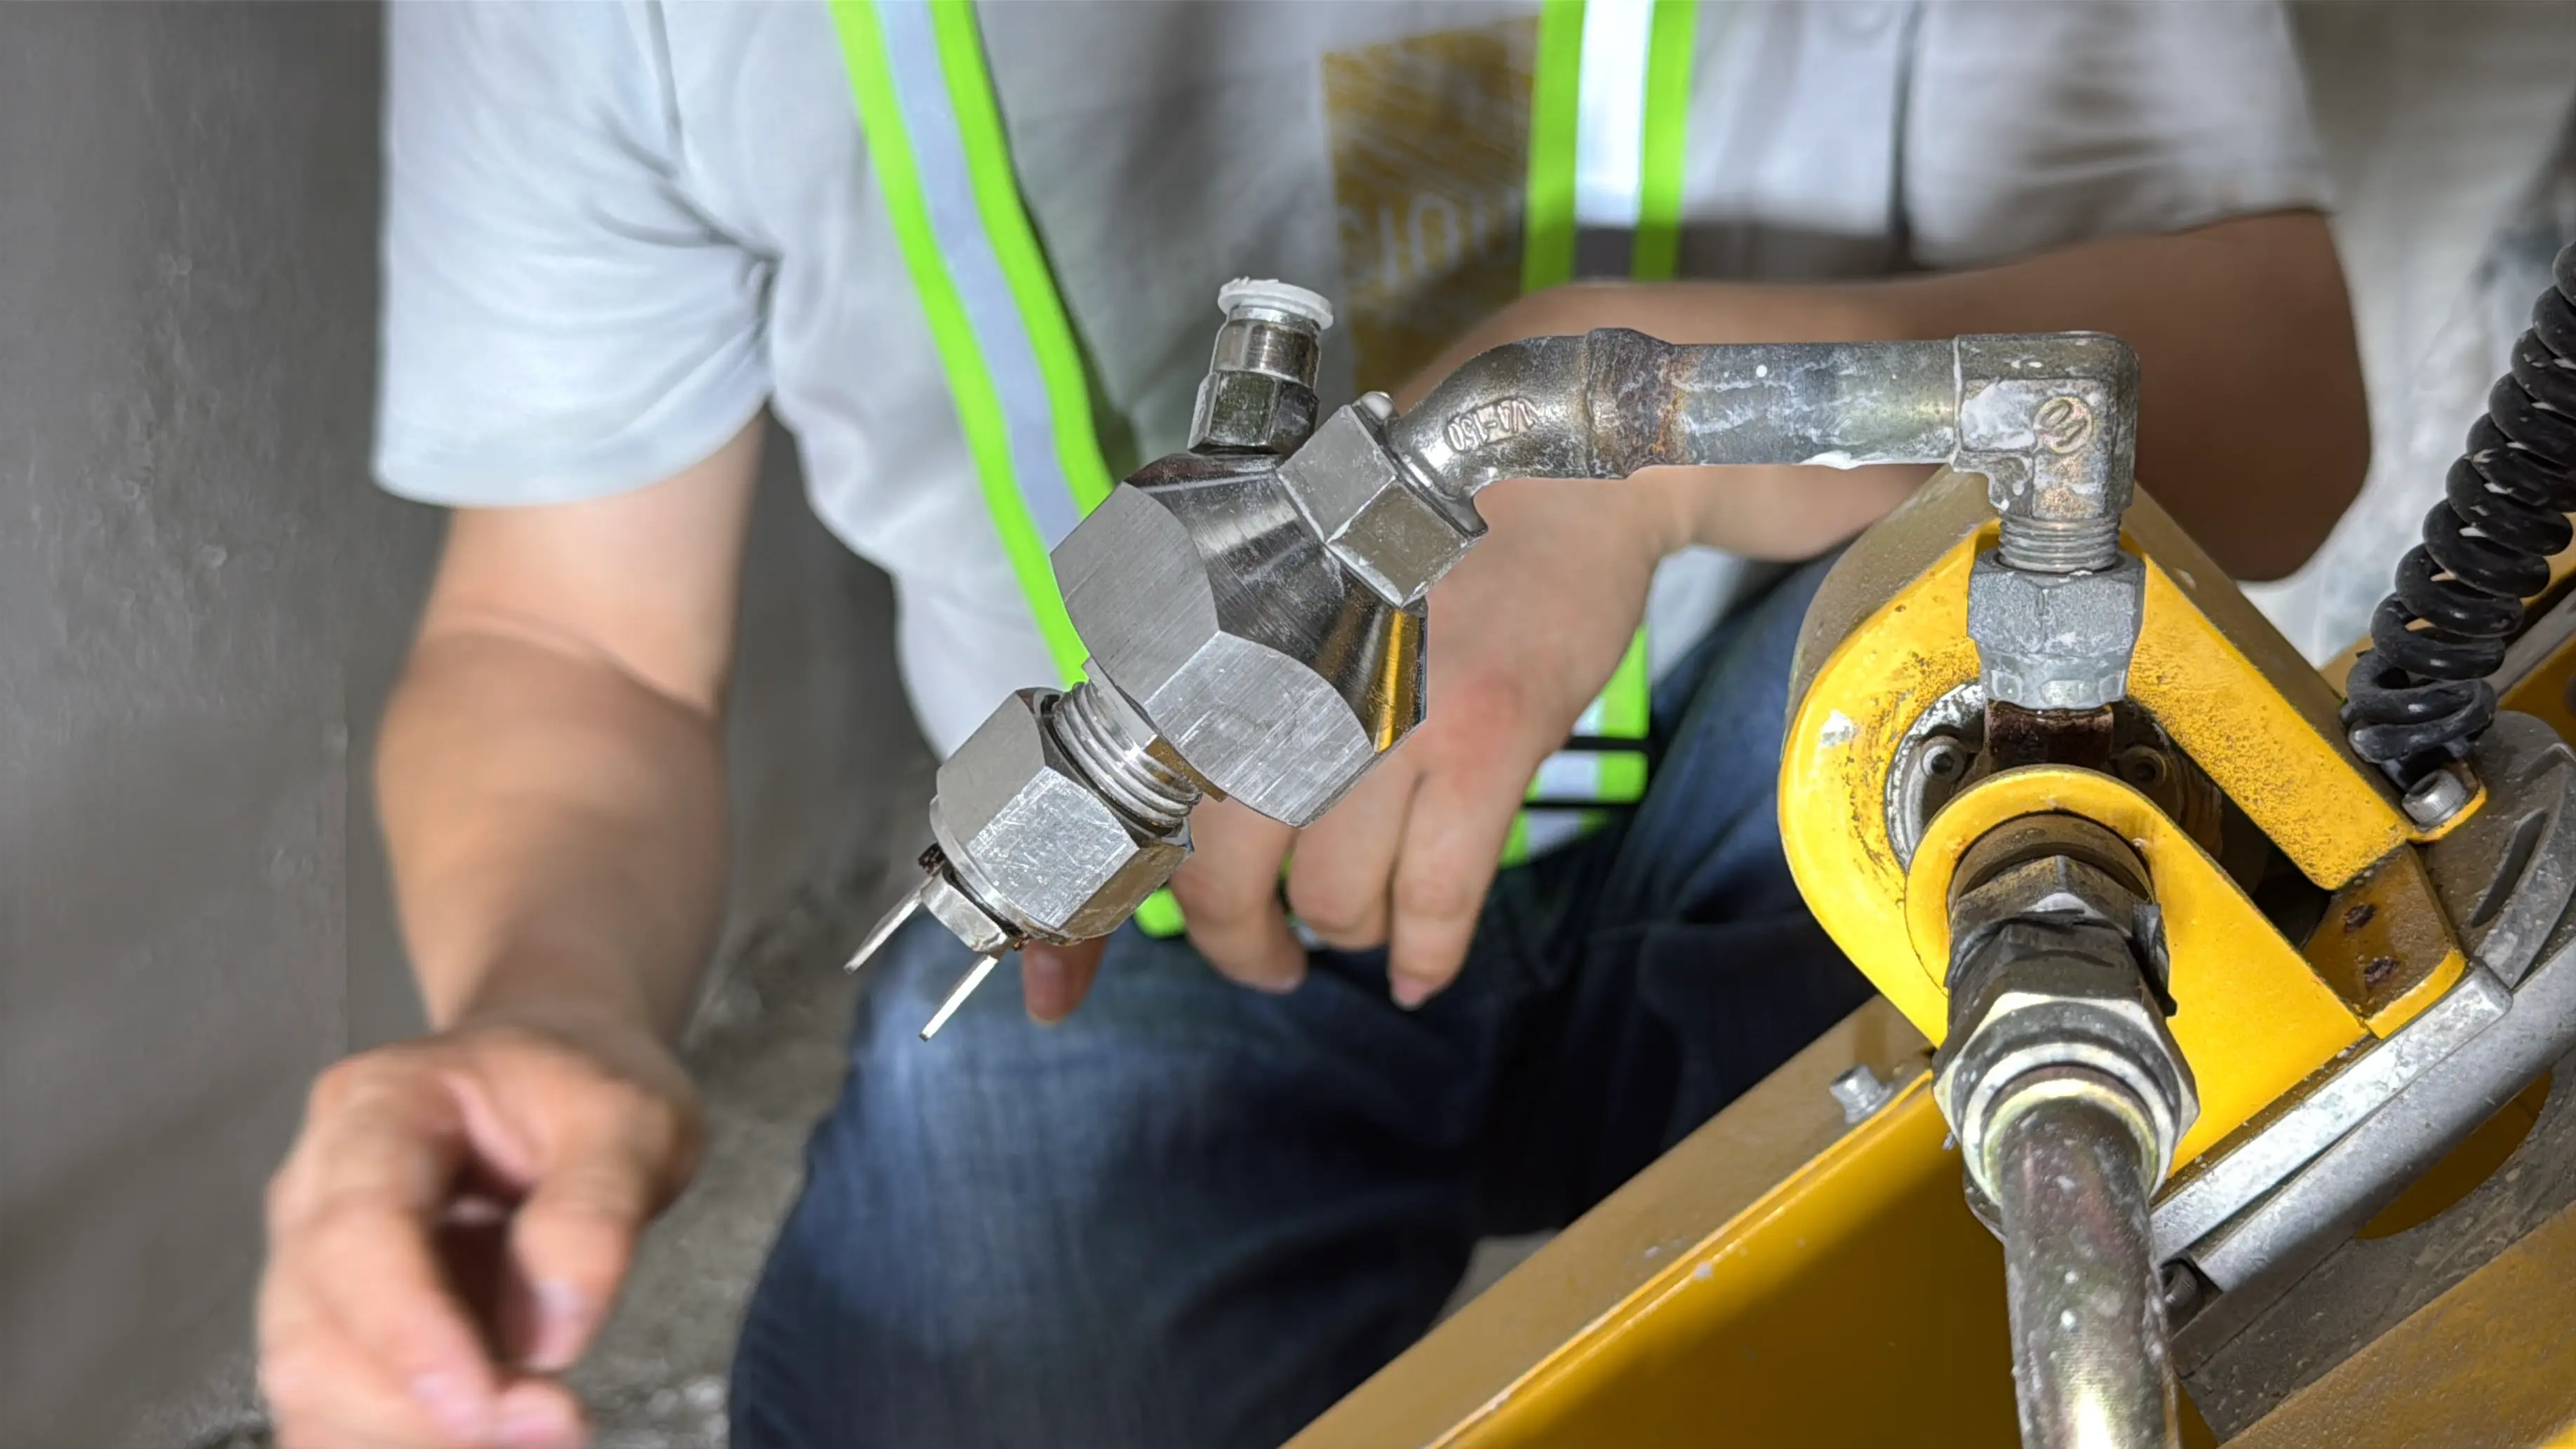
- Connect supply hose and air hose to the robot
- Insert water into the material supply machine
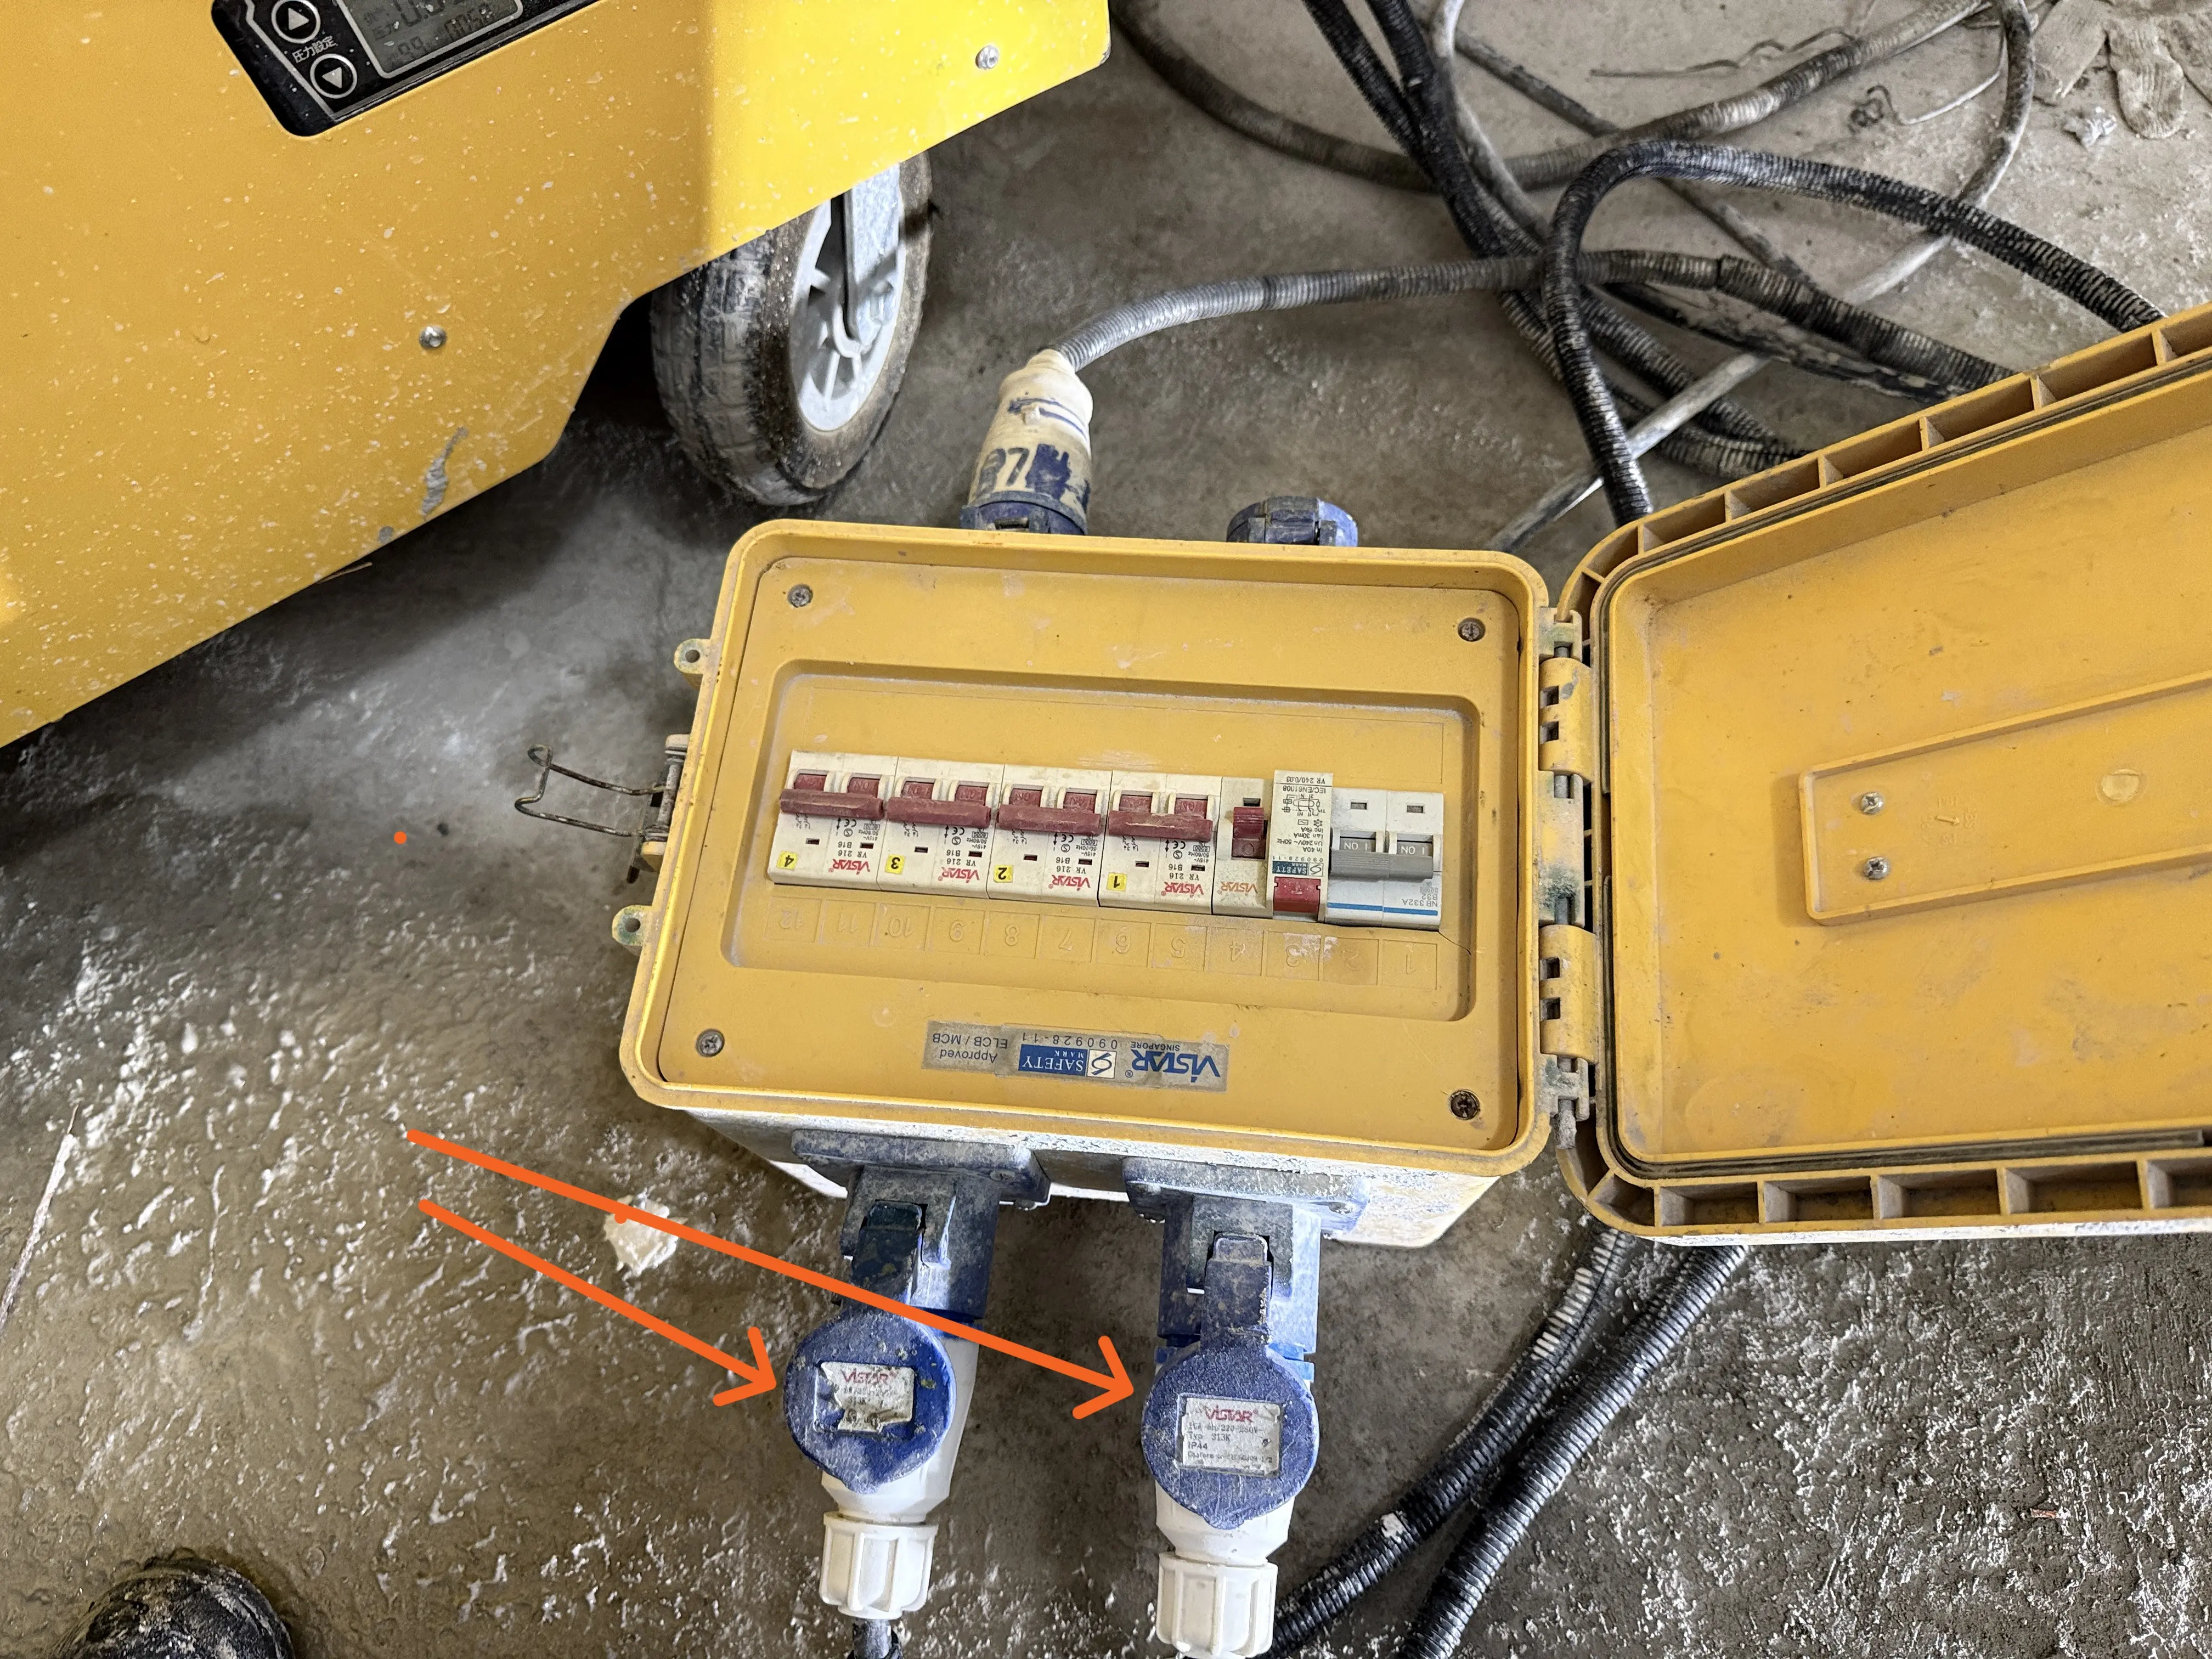
- Connect power source
- Turn ON for the machine (note: make sure the air valve is turn off)
- Turn ON pump machine and manual control
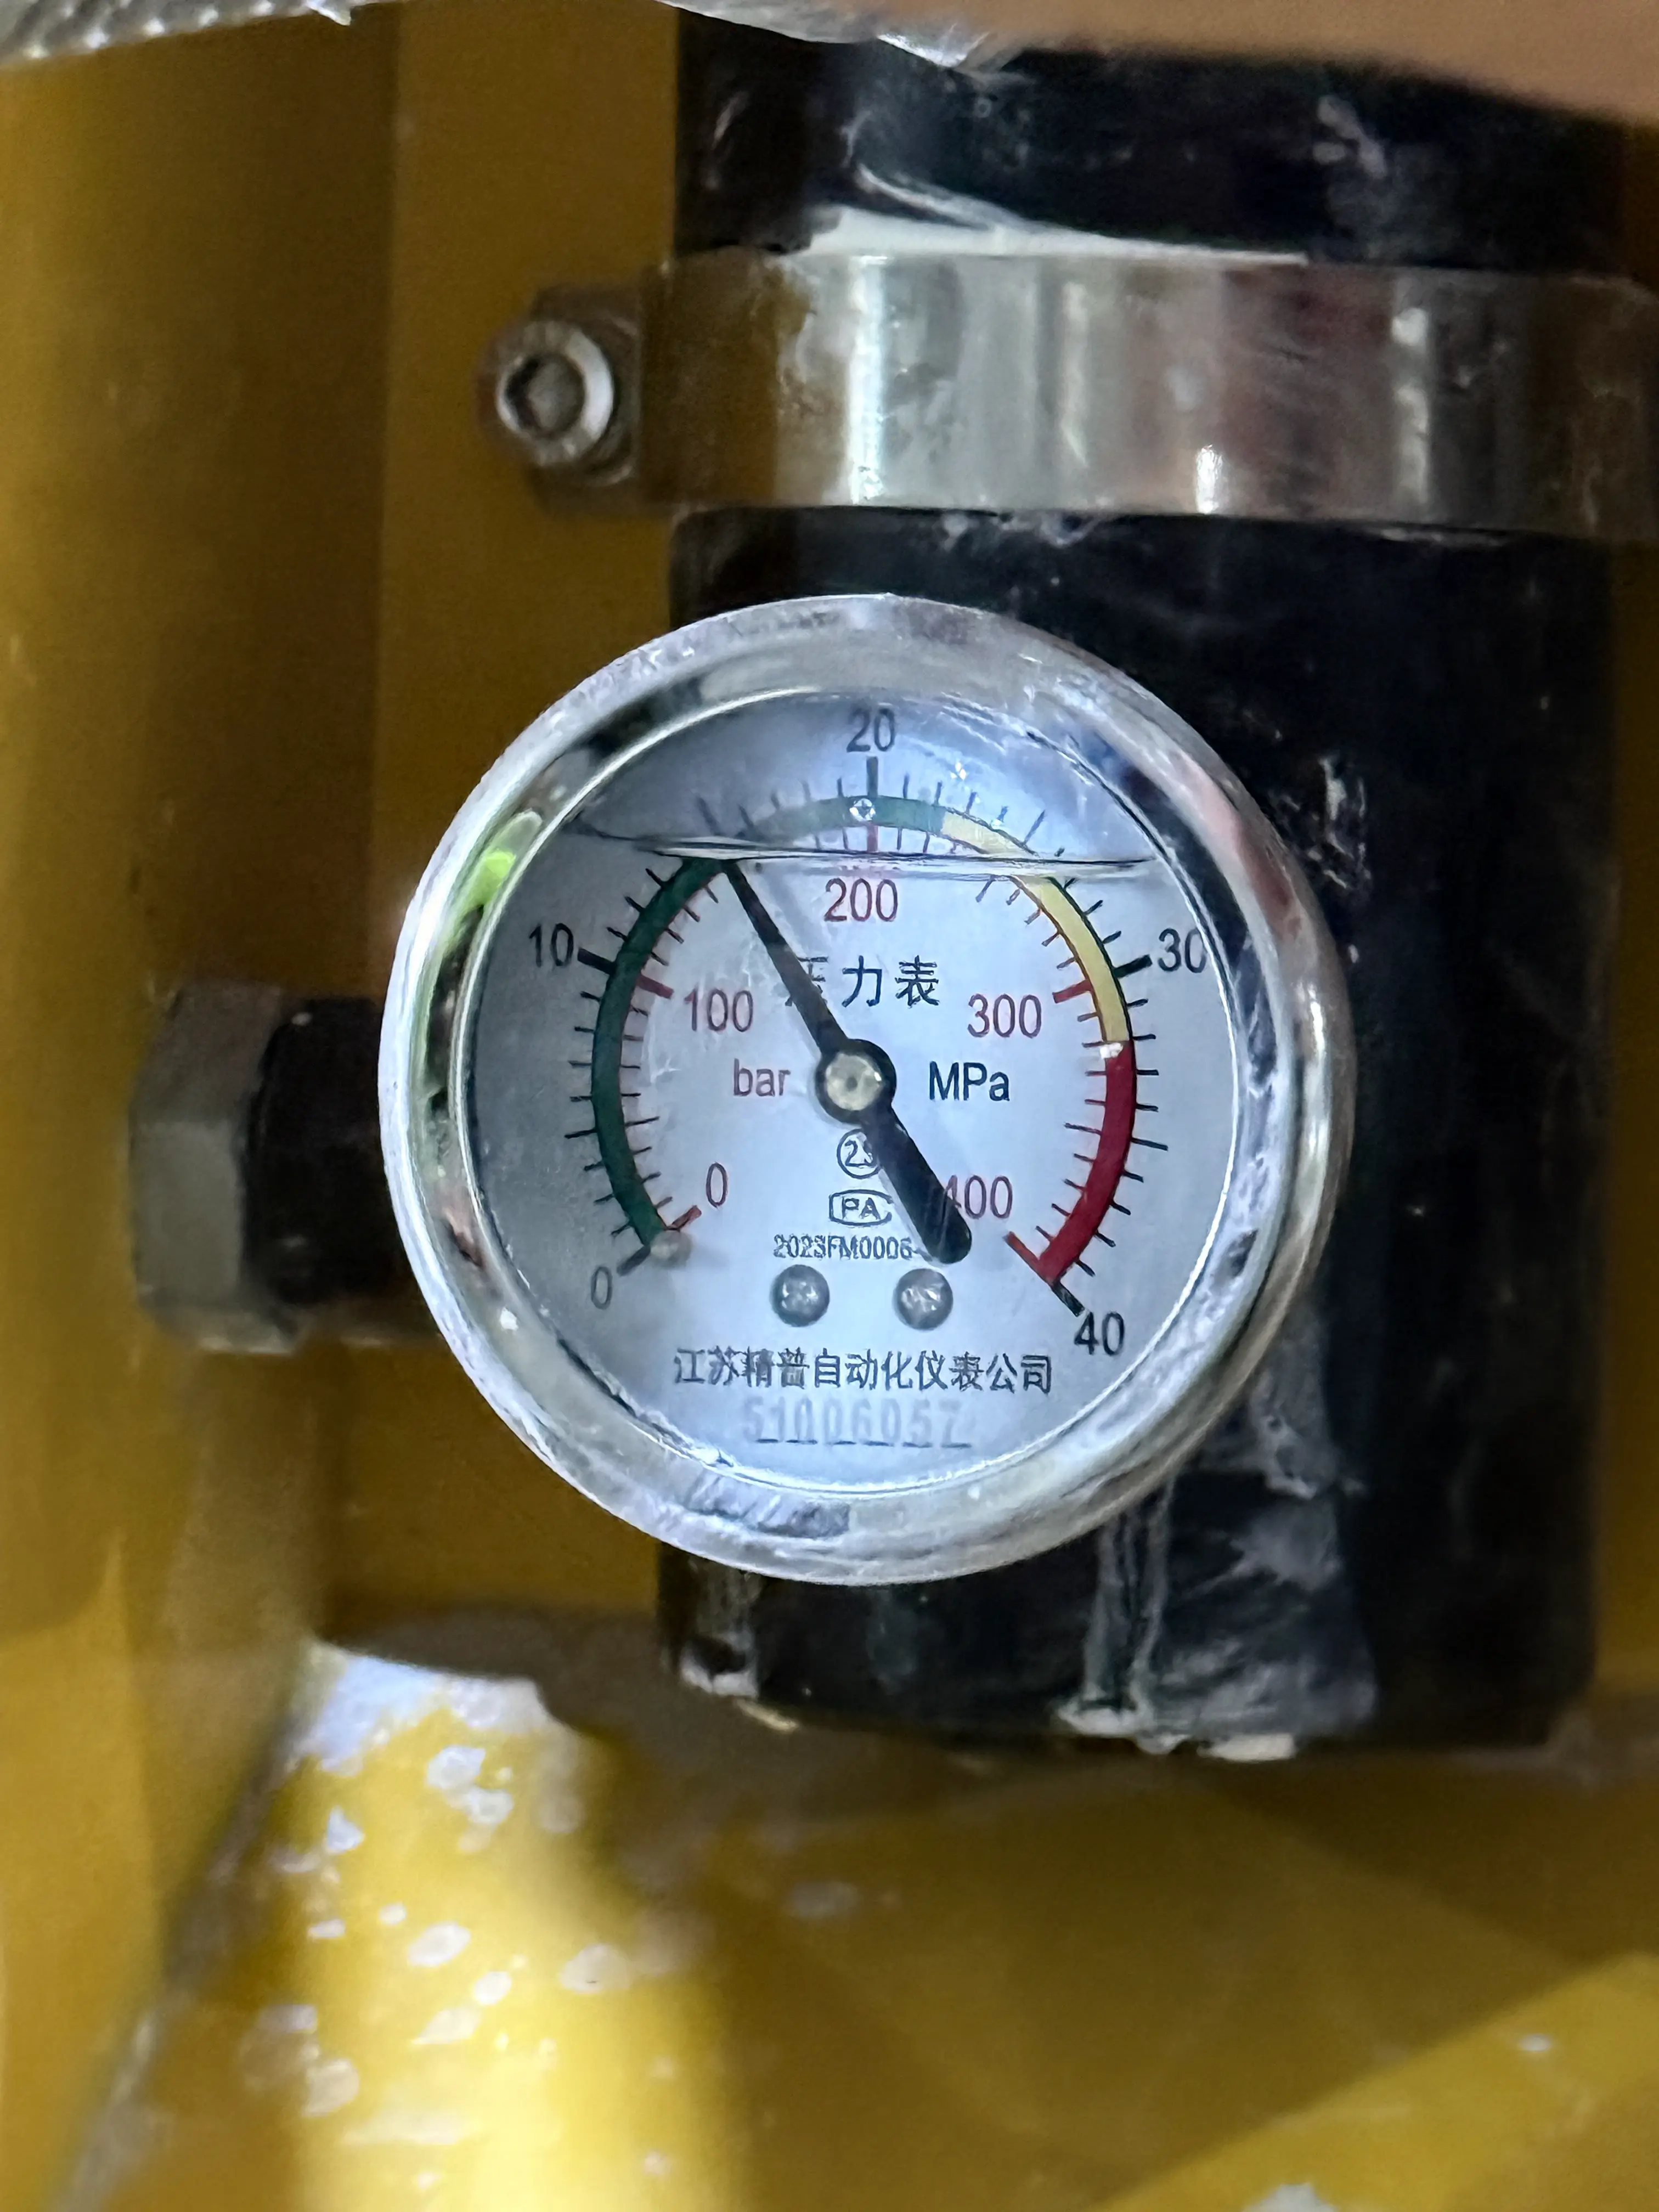
- Knob the air pressure to about 150kP
- Knob and test the water whether the machine is functioning well
- Turn off manual control
- Set robot into standby mode and test the water deposit normally
- Deposit all the water from the supply machine and insert putty
- Reassure step 6 to 10 is same for putty
- Connect and turn on the air valve
- Move to operation area and start
Detail Step by Step Guide with Short Video Clips
Power Supply Requirement for Material Feeder
Initialization of the Robot
Initialization Navigation guide on tablet Application
After ensure successful initialization (Horizontal Head)
fixing the scraper head in place
https://youtube.com/shorts/rteBS5VYoqg
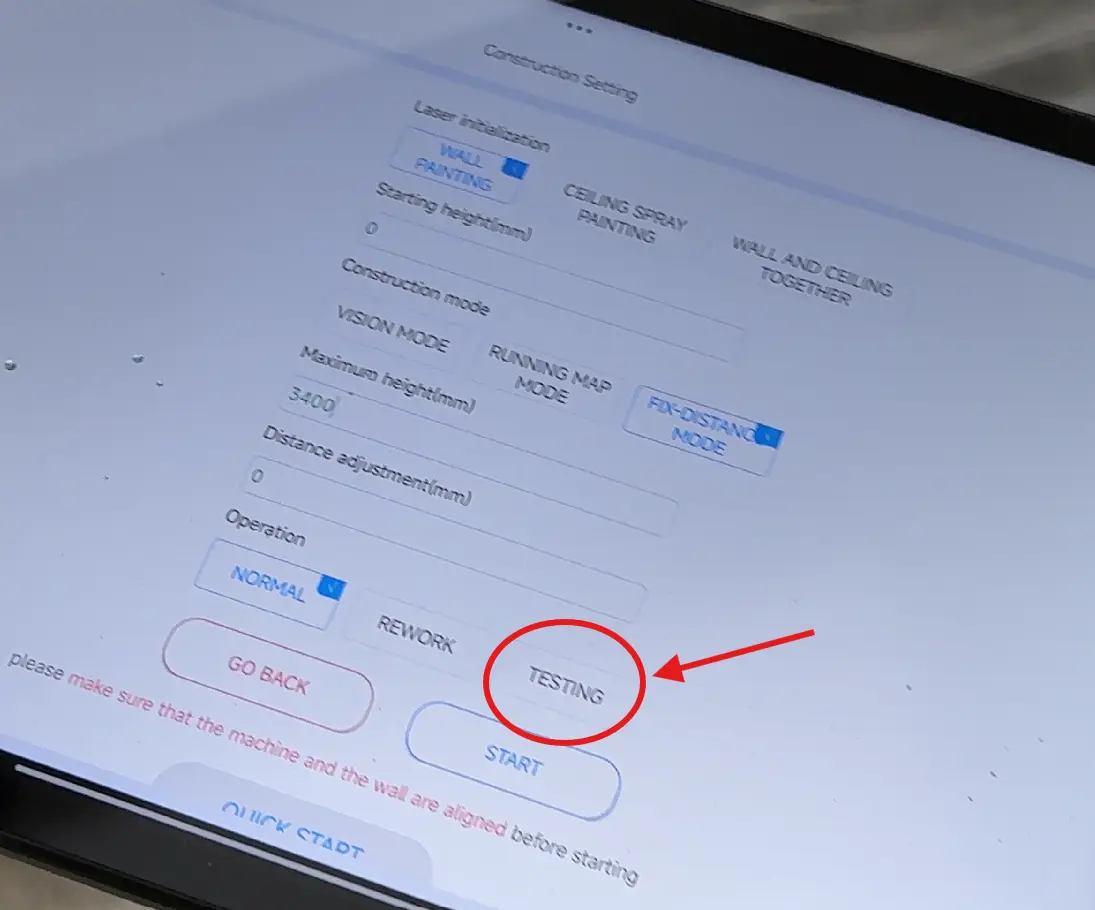
Testing mode confirmation
This testing mode is the same process as normal operation, but before starting the operator will have to choose TESTING.
Tablet Application Navigation (Normal Mode)
Knob air pressure to about 150kP
Positioning the robot arm down for cleaning/ Discharge testing
Cleaning/ Discharge Testing of (water/putty) on material feeder and robot
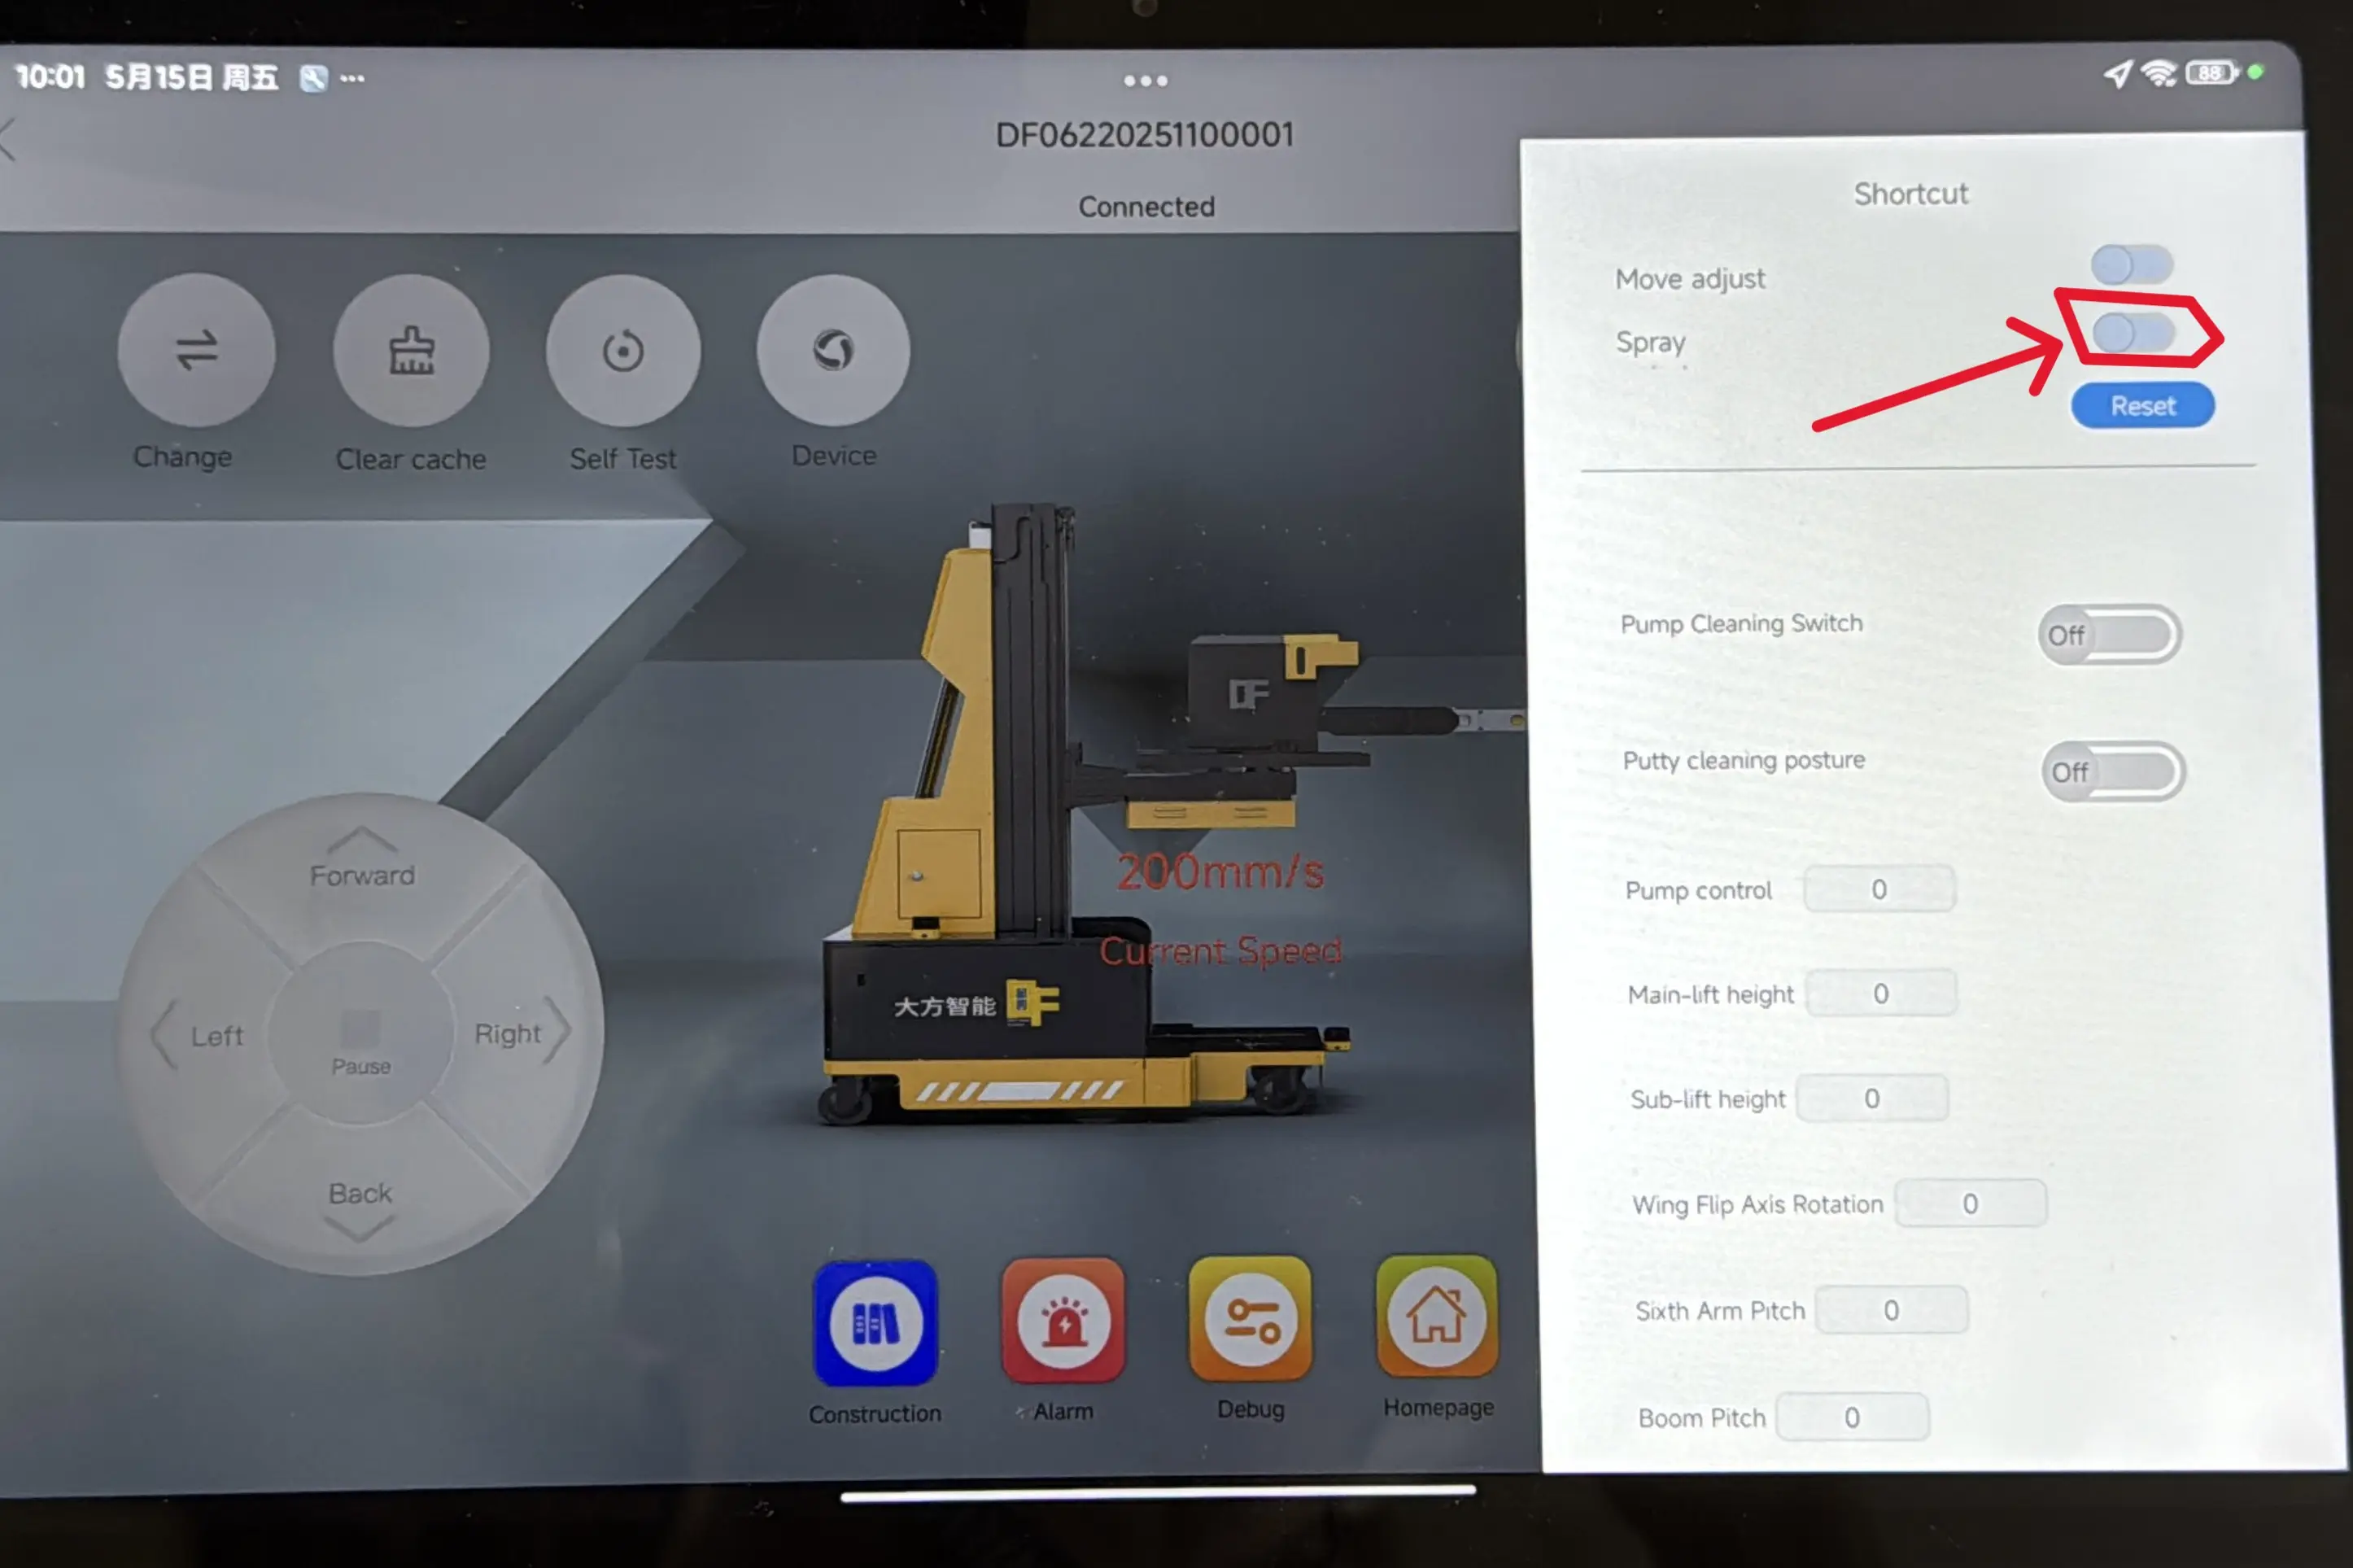
Cleaning/ Discharge Control on Application for Robot
Fitting Spray Head and Switching Auto pumping mode
Switching Auto mode on Material Feeder
- Off Manual
- On Auto
- On Value inside (the valve is ON in the video shown)